


GitLab-CE
进入网页之后先用root登录
然后创建用户组、用户等信息
切换到其他用户,可以赋予管理权限来操作
# 获取gitlab镜像
docker pull gitlab/gitlab-ce:17.6.1-ce.0

# 创建数据目录
mkdir /opt/gitlab && export GITLAB_HOME=/opt/gitlab && echo $GITLAB_HOME

# 运行gitlab容器
# Z 能够确保有足够的权限的权限创建文件
# -h 这里设置一个域名,不然访问不到
# 不设置域名的话,在访问gitlab的机器上,在hosts文件中添加解析:ip:port gitlab
docker run -dit \
  -h gitlab \
  -p 1234:80 \
  -p 2234:443 \
  --name gitlab \
  --restart always \
  --shm-size 1024m \
  -v $GITLAB_HOME/config:/etc/gitlab:Z \
  -v $GITLAB_HOME/logs:/var/log/gitlab:Z \
  -v $GITLAB_HOME/data:/var/opt/gitlab:Z \
  gitlab/gitlab-ce:17.6.1-ce.0

# 查看root账号的密码
docker exec -it gitlab cat /etc/gitlab/initial_root_password

# 重新配置容器中的GitLab
docker exec -it gitlab gitlab-ctl reconfigure
GitLab Runner
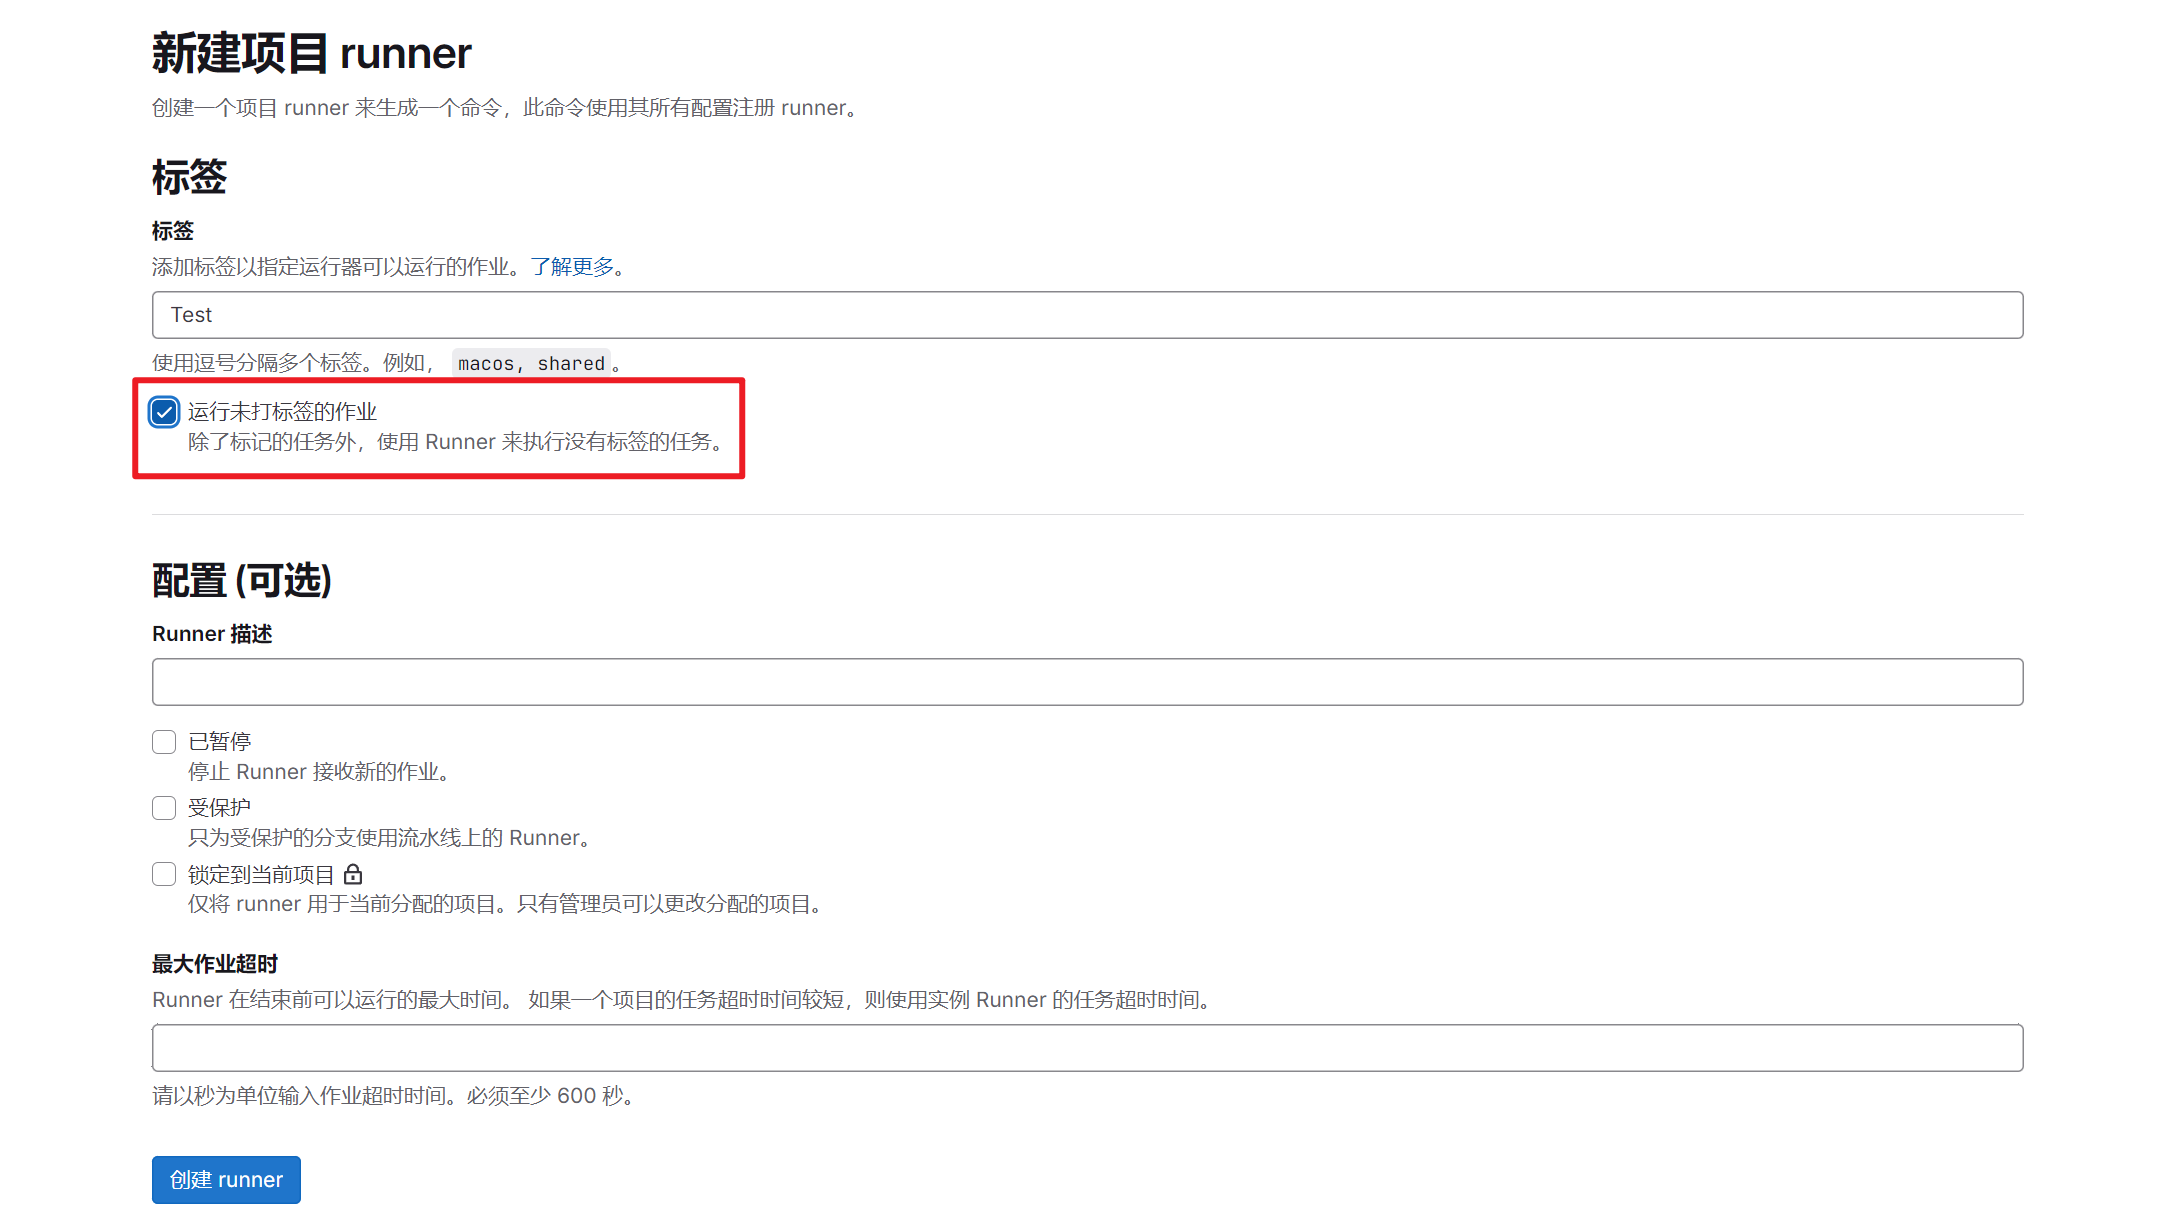
新建Runner的时候,勾选
运行未打标签的作业复制注册的token去注册
# 拉取镜像
docker pull gitlab/gitlab-runner:latest
# 运行GitLab Runner容器
docker run -dit \
-h runner \
--name runner \
--restart always \
-v $GITLAB_HOME/runner/1/config:/etc/gitlab-runner:Z \
-v /var/run/docker.sock:/var/run/docker.sock \
gitlab/gitlab-runner:latest
# 进入Runner容器
docker exec -it runner /bin/bash
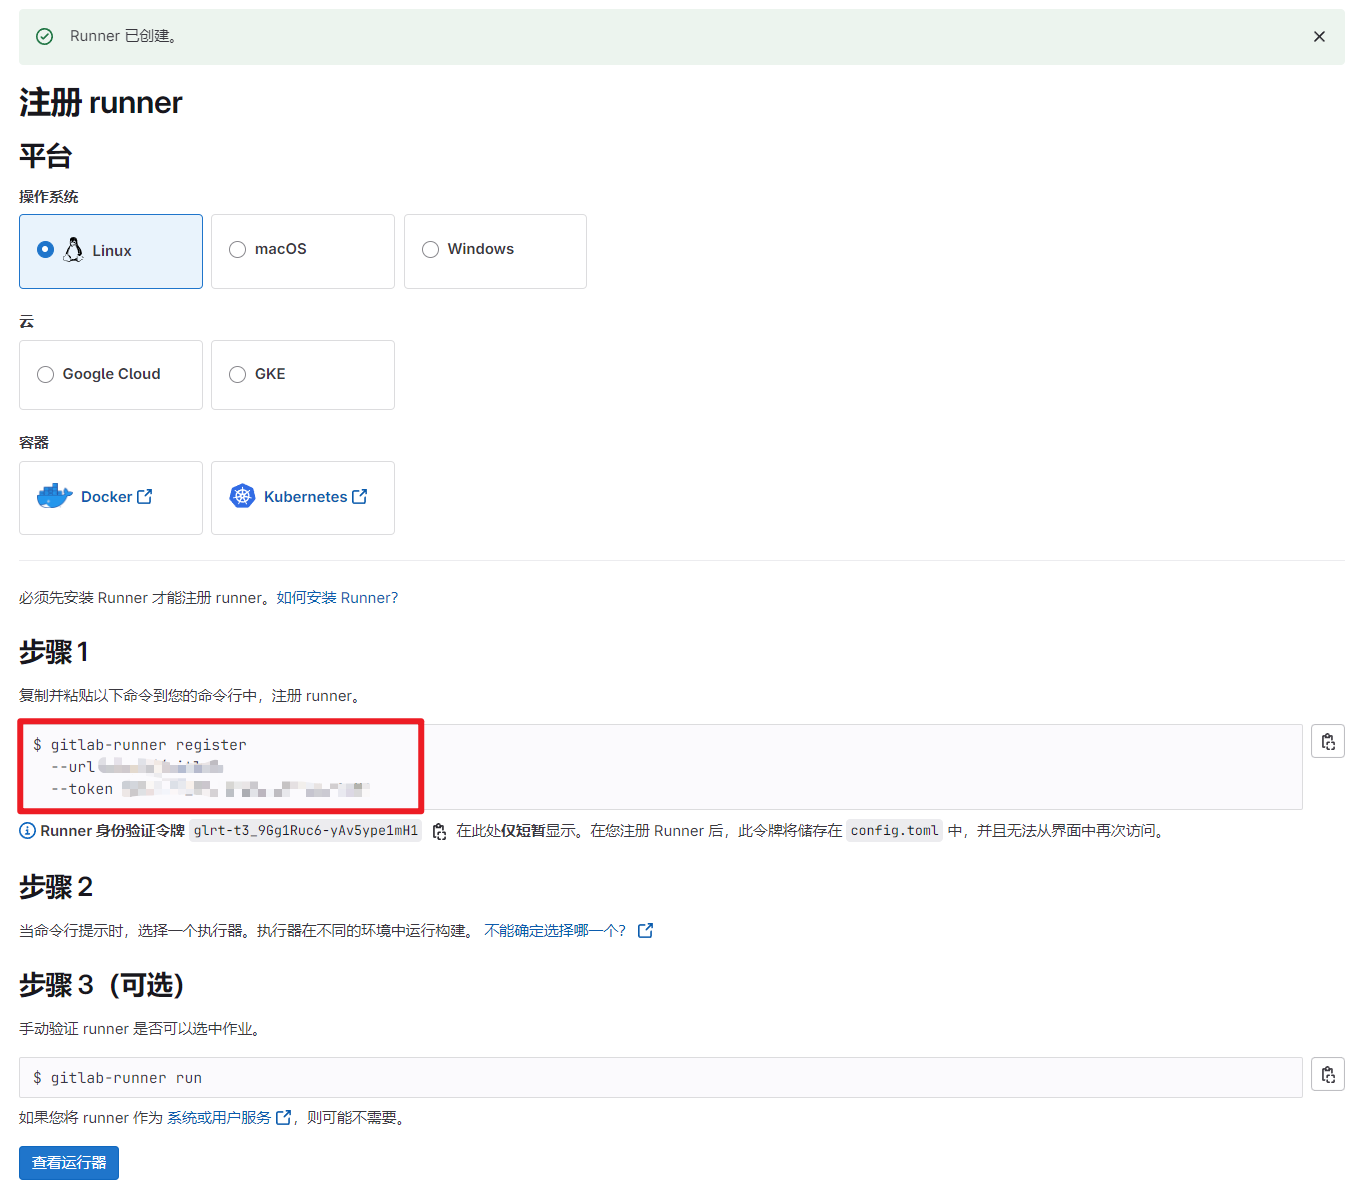
# Web页面中可以查看到注册命令
gitlab-runner register --url your_gitlab_url --token your_token
# 上面是进入容器执行的,下面的命令是直接在宿主机执行就可以的
docker exec -it runner gitlab-runner register --url your_gitlab_url --token your_token
# 注册之后,按照提示输入注册信息
# Runtime platform arch=amd64 os=linux pid=100 revision=374d34fd version=17.6.0
# Running in system-mode.
#
# Enter the GitLab instance URL (for example, https://gitlab.com/):
# [http://GitLab]: your_gitlab_url
# Verifying runner... is valid runner=t1_YaRC98
#
# Enter a name for the runner. This is stored only in the local config.toml file:
# [runner]:
#
# Enter an executor: virtualbox, kubernetes, instance, docker-windows, docker+machine, docker-autoscaler, custom, shell, ssh, parallels, docker:
# shell
#
# Runner registered successfully. Feel free to start it, but if it's running already the config should be automatically reloaded!'
#
# Configuration (with the authentication token) was saved in "/etc/gitlab-runner/config.toml"
# 到这里,GitLab Runner已经注册成功,可以开始运行了。
# 页面上可以看到注册的Runner,点击进入Runner页面,可以看到Runner的状态。Docker-Compose
这种适合单体架构,所有的相关应用都在同一节点上
其他节点的Runner我们可以使用docker run 手动创建及注册
docker pull gitlab/gitlab-ce:17.6.1-ce.0
docker pull gitlab/gitlab-runner:latest

mkdir -p /opt/gitlab/config /opt/gitlab/logs /opt/gitlab/data

docker-compose up -d
services:
gitlab:
image: gitlab/gitlab-ce:17.6.1-ce.0
hostname: gitlab.zhengxingtao.site
container_name: gitlab
restart: always
shm_size: 1024m
ports:
- 1234:80
- 2234:443
volumes:
- ${GITLAB_HOME}/config:/etc/gitlab
- ${GITLAB_HOME}/logs:/var/log/gitlab
- ${GITLAB_HOME}/data:/var/opt/gitlab
runner1:
image: gitlab/gitlab-runner:latest
container_name: gitlab-runner-1
restart: always
volumes:
- /srv/gitlab-runner/config:/etc/gitlab-runner
- /var/run/docker.sock:/var/run/docker.sock
depends_on:
- gitlab
runner2:
image: gitlab/gitlab-runner:latest
container_name: gitlab-runner-2
restart: always
volumes:
- /srv/gitlab-runner/config:/etc/gitlab-runner
- /var/run/docker.sock:/var/run/docker.sock
depends_on:
- gitlab
runner3:
image: gitlab/gitlab-runner:latest
container_name: gitlab-runner-3
restart: always
volumes:
- /srv/gitlab-runner/config:/etc/gitlab-runner
- /var/run/docker.sock:/var/run/docker.sock
depends_on:
- gitlab
runner4:
image: gitlab/gitlab-runner:latest
container_name: gitlab-runner-4
restart: always
volumes:
- /srv/gitlab-runner/config:/etc/gitlab-runner
- /var/run/docker.sock:/var/run/docker.sock
depends_on:
- gitlab
runner5:
image: gitlab/gitlab-runner:latest
container_name: gitlab-runner-5
restart: always
volumes:
- /srv/gitlab-runner/config:/etc/gitlab-runner
- /var/run/docker.sock:/var/run/docker.sock
depends_on:
- gitlab
runner6:
image: gitlab/gitlab-runner:latest
container_name: gitlab-runner-6
restart: always
volumes:
- /srv/gitlab-runner/config:/etc/gitlab-runner
- /var/run/docker.sock:/var/run/docker.sock
depends_on:
- gitlabgitlab-ci.yml
根据情况修改yaml文件
stages:
  - build
  - test
  - deploy

variables:
  NODE_ENV: 'production'
  FLASK_ENV: 'production'

# 前端构建
frontend_build:
  stage: build
  image: node:14
  script:
    - cd frontend
    - npm install
    - npm run build
  artifacts:
    paths:
      - frontend/dist

# 后端构建
backend_build:
  stage: build
  image: python:3.8
  script:
    - cd backend
    - pip install -r requirements.txt

# 前端测试
frontend_test:
  stage: test
  image: node:14
  script:
    - cd frontend
    - npm test

# 后端测试
backend_test:
  stage: test
  image: python:3.8
  script:
    - cd backend
    - pytest

# 部署
deploy:
  stage: deploy
  script:
    - echo "Deploying to production server..."
    # 这里可以添加部署脚本,例如使用scp或rsync将文件传输到服务器
  only:
    - main

评论区